 I remember I was extremely attracted to this Laneige promo poster when I came across it on Rouge Deluxe. I was determined to buy the eyeshadow palette as soon as it comes out in the stores. When I did test it out at the Raffles City Robinsons counter, I was disappointed that the shadow is quite sheer and the colour is not as intense as shown on the model in the poster. I then decided to try create a similar look using products I already had instead of using the palette. Although the result was not 100% the same, I would say it was pretty good!
Here are the products I used to create the look:
 From left to right, top to bottom: Ardell false lashes in Sweeties Black, Bobbi Brown Long-wear Gel Eyeliner in 1 Black Ink, Laneige Mystic Veil Blusher, Cezanne Eye Colour N in 23, Kanebo Kate Diamond Cut Eyes in GN-1, YSL Mascara Volume Effet Faux Cils in Noir Radical, Majolica Marjoca Curl, curl toward the sky mascara base, Esprique Precious Glamorous Glossy Eyes in PU10, Urban Decay Eyeshadow Primer Potion, Heroine Make Eyelash Fixer, YSL Rouge Volupte in 1, Shu Uemura Rouge Unlimited in 940M
16 Steps:

1. Take the darker purple of Esprique Precious Glamorous Glossy Eyes in PU10.

2. After priming your eye, use your finger to apply the cream eyeshadow at the outer crease of your eye. Use light sweeping motions. If you want the purple to be more intense, apply more of the product, layer by layer. Here I apply 2 layers.

3. Then take the lighter purple from the same Esprique cream eyeshadow.

4. Apply the colour at the inner crease of your eye.

5. Using an eyeshadow brush, sweep the pale pink shade from the Cezanne palette over the inner crease, on top of the light purple cream shadow. You can use any pale pink shade you have.

6. Using an eyeliner brush, line your lower eye with the dark purple cream shadow.

7. Line the lower inner corner of eye with the pale pink Cezanne eyeshadow.

8. Using a large brush, apply any shimmery white eyeshadow at your brow bow area. Here I use the white eyeshadow from my Kate palette.

9. Line your eyes in black. The key here is that you must also line your upper and lower waterline to create the look of fuller lashes. I recommend using a good gel eyeliner as the black will then be more intense. I use the Bobbi Brown's gel eyeliner here.


10. Apply mascara base and black mascara. Apply to your lower lashes as well. You do not need curl your lashes that much here.
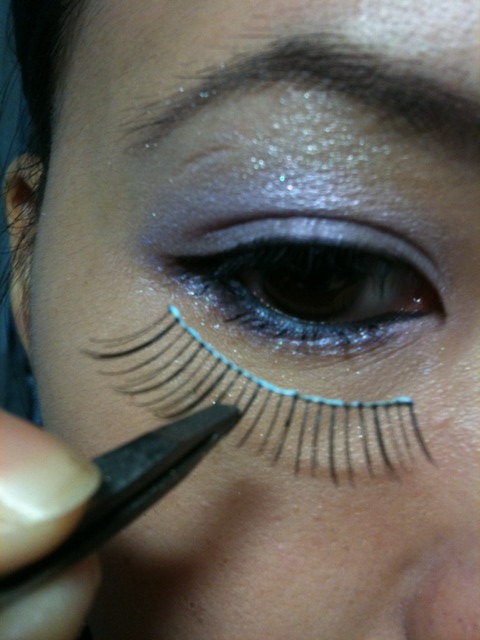
11. Apply your false lash as close to your natural lash line as possible.

12. The false lash is quite natural isn't it?

13. Curl your lashes lightly to join your real lash and false lash together.

14. Smile. Apply blusher to the apples of your cheeks.

15. Using the YSL lipstick, apply the colour to your lips.

16. Since I find the colour a bit pale, I apply the Shu Uemura lipstick to the centre of my lips so that the colour will not be so light.

FINISHED!


Hope you have enjoyed this look!
2 comments:
Hi,
Love the look you did, very pretty! I like the false eyelashes too, which look very elegant. The Laneige eyeshadow palette was not really worth the price, which is a pity as the cover design is so lovely.
Hi Haru,
Thanks for your comment =) I totally agree with what you said about the Laneige palette. I don't think it's possible to create the intense look from the poster even with eyeshadow primer. But I like the foundation and blusher.
Post a Comment